Whether you have large sweeping garden beds, small pops of planted area, or simply the base of a tree or wood line, plant flowering bulbs in Fall for a beautiful burst of color in spring.
Growing up, my mom had several areas of our gardens planted with tulips. She never ventured far from a standard tulip, one of a single color and traditional oval petals. There wasn’t a mass planting, or good Lord forbid, a mixture of colors in one spot. Nope…red tulips, sometimes white, planted precisely eight to ten inches apart. Every now and then a rogue yellow would pop up, transplanted during the winter by squirrel or chipmunk.
When my husband and I bought our house, we closed in the middle of October, the absolute perfect time of year for planting bulbs in our Zone 4 climate. I was tickled…and a bit over-zealous…at the garden store. I bought hundreds of bulbs of every size, bloom time and color. Daffodils, tulips, crocus, hyacinth, allium…you name it, I had it in my bag. Come hell or high water, I was going to reach my goal of blooming glorious spring gardens.
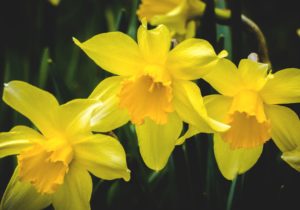
Then came the digging…holy hell…I had a lot of digging. Whose dumb idea was this? What was I thinking? I spent an entire day digging holes in my brand new gardens at my brand new home. I dug until my body ached so bad, I just couldn’t dig anymore. So.many.holes. In my yearning to finish, I chucked an armful of daffodil bulbs – well over a dozen of them – into one giant hole. Come spring…that damn daffodil hole was the most beautiful giant clump of daffodils I’d ever seen. JACKPOT!
Twenty years later, I’m still planting bulbs. My friendly, neighborhood critters like to transplant them – tulip bulbs apparently are delicious; daffodil not so much. I have a couple random tulips that show up in the middle of my lawn that end up mowed down before I can move them. There are “sometimes hyacinths” in a backyard bed. I call them “sometimes hyacinths” because sometimes they’re there…and sometimes they’re somewhere else. I haven’t figured those out yet. And, my giant allium have now disappeared. Those were amazing…tall spires with giant lavender globes. Apparently those are delicious, too.
So, this year, I’m back in the “hundreds of bulbs” club, replanting all my spring color once again. I’m skipping the daffodils. Those have held up beautifully, and have spread to giant, breath-taking bunches. But, I’m back down the path of tulips, crocuses, hyacinths and allium. I have bag-loads in multiple colors, heights, bloom times and petal shapes. I can’t wait until spring! Until then, here’s how I do it.
Timing the Buy
If you’ve read any of my blog, you know I’m down for a deal. I’m not lured in when the spring bulbs hit the garden and big box stores in July…no sir! I wait until the middle of September when they start going on sale. Now, there’s a trick to this – getting the bulbs into the ground before the snow flies and the ground freezes (this applies to us lucky souls who actually have “real” winters). It’s a bit like shooting craps…will my luck hold that I can wait long enough to get the bulbs and then in the ground before the snow flies? I wait as long as I can into September, not for any horticulturally driven reason…because I’m CHEAP and bulbs get really cheap toward the end of September! A big box home improvement store nearby had 15-bulb tulip packs for $3.99. No, that’s not a typo! And they’re a reputable brand from Holland. Yeah, I stocked up on those babies.
Bulb Selection
Before I hit the store, I give some thought to color, time of bloom, and height of the flowers. If I do this right, I’ll have blooms coming in waves pretty much from the first clearing of snow (anywhere from March to April in my Zone 4 area) through mid-June. And that’s just enough time for my perennials to get their groove. Bulb packages will always have details on them for you, and they’re easy to understand. Watch for:
- Bloom time
- Bloom height
- Where to plant – sun/part sun/part shade
- When to plant
- How deep to plant and how far apart
Think about how you want the color to show up – do you want a single color or single flower type; blocks of various color or flowers; random colors and flowers. You can create your color image any way you like, and that’s awesome fun.
Single Color – make your selections by color first, then by bloom time, then by height.
Blocks of two or more colors or flowers – decide which colors you want first. Then, select the types of flowers you want. Sort by bloom time, then by height. Do the reverse for flower blocks – flowers first, then colors, bloom time, and height.
Random Colors – simply pull everything you love off the shelf. Make sure you have a variety of bloom times and heights, then toss them into your cart and head to the checkout. You can wing it from here!
Bulb Inspection
When you get bulbs, they’re typically in a package you can see through and squeeze a bit. That’s right, squeeze. When I find what I want, I give a gentle squeeze to the bulbs, right through the packaging. They all should be firm. If a bulb is soft, it’s beginning to rot. Or, it’s dried out because it’s already dead. Call me superstitious, but you know the saying about “one bad apple spoiling the whole bunch”. I don’t buy any packs without every bulb being nice and firm.
Dig This
O.k., ready for the real work? It’s time to dig. You have some options for how and where you dig your holes. First, think about what you want the presentation to look like when you’re in full bloom.
- If you want each bulb to literally stand on its own, you need to dig one whole either for every bulb or you could put 2-3 of the same bulb into a single hole. It’s a beautiful way to plant, especially if the bulbs are planted to come up between other flowers and shrubs. Rather a naturalized look. As you can imagine, this is a lot of work.
- If you want larger pops of color, simply dig larger (wider, not deeper) holes and place multiple bulbs in each. This is my preferred method. For tulips, crocuses and daffodils, I tuck 8-12 bulbs (less for large bulbs; more for small bulbs) very close together into larger holes.
Next up is how to dig. Sounds silly but if you’re going the manual route, a pointed shovel works great. My advice is to skip the bulb planters, the ones that look like a giant apple corer. A shovel goes much quicker and you have the benefit of handle leverage, which is easier on your body.
Now…if you really want a super slick tool, go out and get yourself the long-rod auger bit for your power drill. That baby is amazing! Essentially, it’s an auger bit on a 3-foot down rod. You simply attach to your power drill and turn it on. The power of the drill turns the auger and you have holes in mere seconds, even in tough-to-dig soil (like my clay!). If you’re doing larger holes, you simply move the auger around to create the larger hole. Easy peasy! Works great for digging any plant hole, and it’s super for hauling out that big nasty picker weed! Best garden investment ever…
Last diggity tip – dig all your holes at once. Get the worst of it over first. Then it goes really quick, just dropping bulbs in holes and covering them up!
Tips Up…Roots Down
I’ll never forget my dad asking, “Did you put the roots down?” I thought it was yet another of his funny jokes, but he was serious. Take a look at your bulbs before putting them in the ground. Some, like tulips, have an obvious top and bottom. The top is pointy; the bottom is flat. But, some of the smaller bulbs are a bit more difficult to see which way is up…or down. Truth is, I don’t know that it really matters. Bulbs are a bit like cats…they seem to land on their feet when it comes time to bloom. Weird, really! But, aim for roots down.
Get the Look
So the easiest decision for planting is height – tall in back, short in front – just like a group photo. But still be aware of bloom time to ensure you have a good blend of bloom times in an area. Otherwise, you’ll have periods of nothing in areas of your gardens.
Another consideration is when other plants are going to leaf out and bloom. If you have early perennials, tuck some later blooming bulbs nearby so that you have your bulb flower color until your perennial gets rolling.
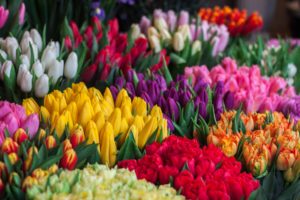
I plant in bunches, and because I love random color, I put all my bulbs by type into buckets, regardless of bloom time, mix them up and plant away. For example, I have separate buckets for tulips, daffodils, crocuses, hyacinths, and alliums. I may have seven colors and petal shapes of tulips, but they’re all mixed in a single bucket. Then, I plant them 10-12 per large hole and they come up an absolutely gorgeous, wild mix of colors, shapes and sizes of tulips. I plant in bunches so I get what looks like giant bouquets coming out of the ground. That’s a personal preference.
The Best Part
The best part is that once bulbs are in, they’re good to go for several years. There’s no need to dig them out in spring. In fact, once they’re done blooming or you’ve cut every gorgeous flower for bouquets, just leave the leaves and plants right where they are. DO NOTHING until the leaves begin to brown. During this time, the plant is taking all the nutrients and energy from the leaves back to the bulb for the next season. For instance, my daffodils aren’t brown and ready to be cut back until well into July. In the meantime, their dying leaves are being hidden by daylilies and other perennials.
Let’s Split
What many people don’t know is that bulbs tend to cleave, or split, into more bulbs…imagine that! So the handful of bulbs you may have put into a hole are now a giant bouquet of beauty. Eventually, if there are too many plants coming up in one spot you’ll see less and less actually bloom. That’s the time to split. Simply dig around the area of your bulbs, leaving a good margin on the outside so you don’t cut the bulbs. Shake the dirt clump and the bulbs will fall out. Shake the dirt loose from the bulbs and store in a cool, dry place until fall. Then replant elsewhere. It’s important they’re kept dry. Otherwise, they’ll get moldy. Use an old onion bag, or even pantyhose or nylon stocking, and hang in a dry place. I find our garage works well unless we have an exceptionally humid summer. My basement is my alternate location.
So there you have it, a comprehensive run-down for how to plant spring blooming bulbs. Let me know how it goes! Drop me a comment and for Pete’s sake…send me some pics! I’d love to see your rainbow!
